There are various ways to fix underwater pictures in photoshop. Picassa does a pretty great job with the "lucky button." The first thing you have to understand is that as you dive down deeper, the first color to go is "red." This will give all your photos a bluish/greenish cast. One quick tip is to add a layer, fill it with red, and then change it to overlay.
Another method is a simple method of using the "Curves" function. Here, I will walk you through it step by step. And I mean Step by step.
Step 1. Open your picture in Photoshop. (Hey, I told you I was going to walk you step by step)
Copy the layer that has your picture by pressing "control" and "j." I always like to work off a copy layer so if I screw up, then I can just delete that layer and start over. You can also see if your improvements are pleasing by clicking the "eye" icon to the left of the layer and you should only see your original background layer.
Here we have a cute little picture of turtles having a morning snack on the sandy reef. Not a lot of things of color so we can't drastically change it, but we can add slight improvements.
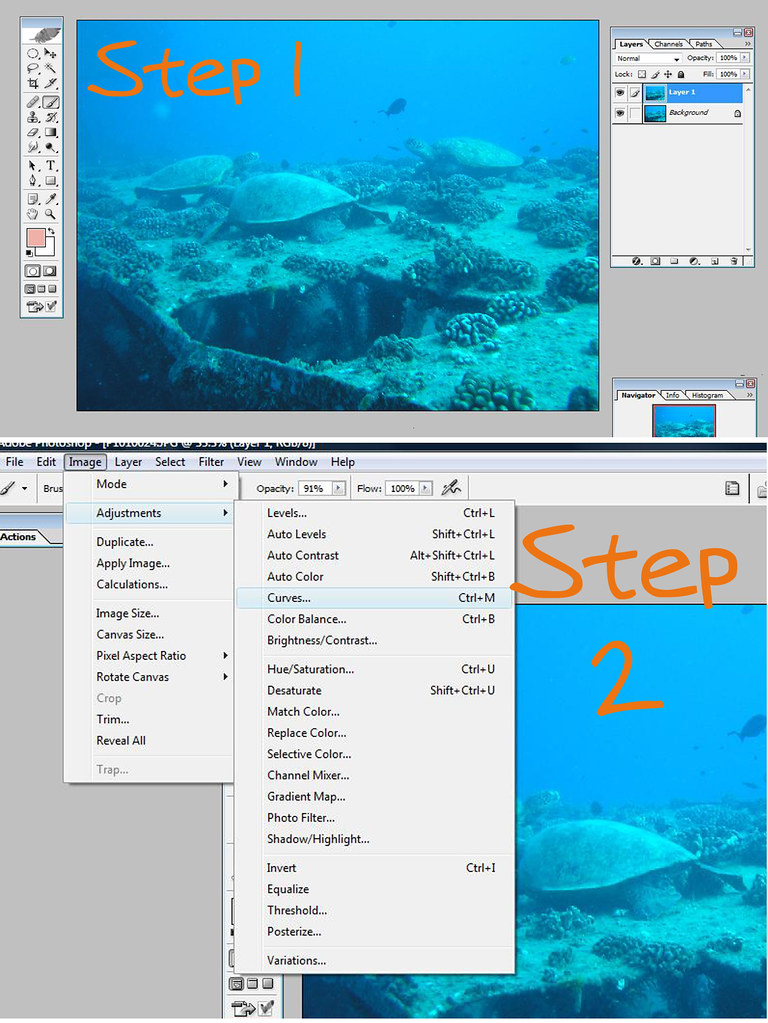
Step 2: Go to "Image" in the main toolbar---> "Adjustments" ---> "Curves
A popup window should now appear. Good, we're going to play with the levels of red, green, and blue in our picture. Those are our primary colors. Remember, the main problem is we don't have enough red.
Step 3: Select "auto" in the Curves Pop Up Window. Don't press okay or close the window yet.
-Hopefully, you should see some change in your image. In our case, it dropped the blues and greens down and raised the red as much as it could.
In some areas, like the darkest areas of my reef in this photo, the red will go overboard and develop red spots. Let's fix that.
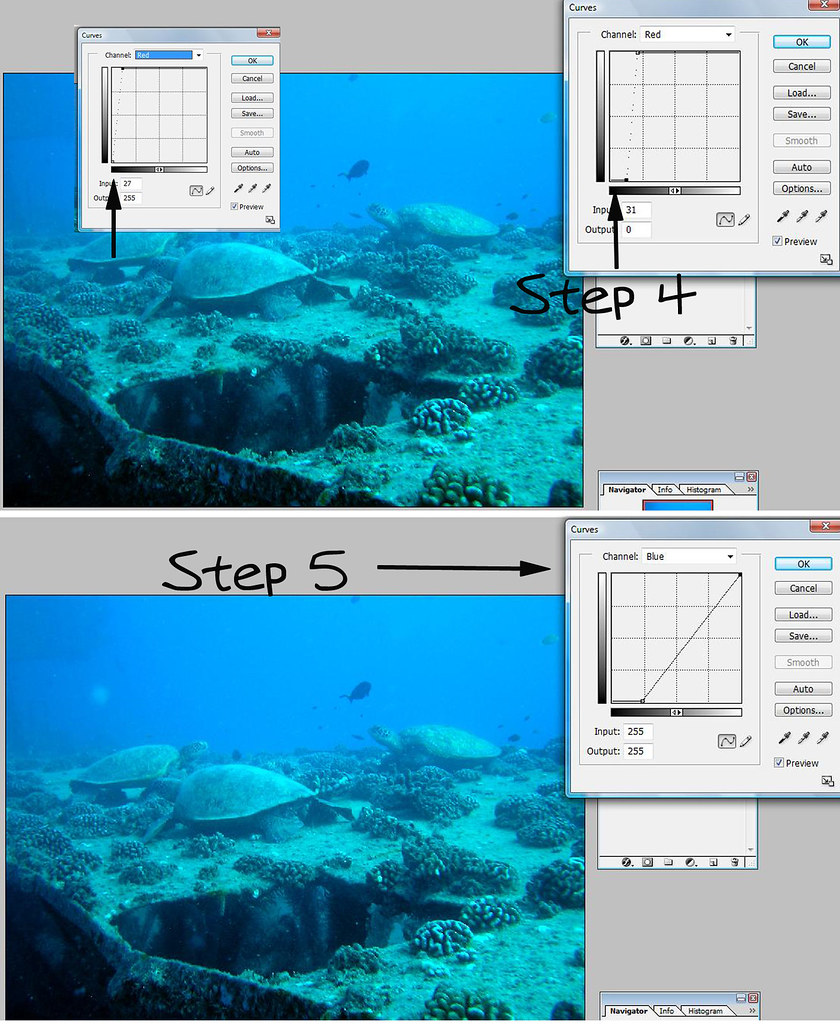
Step 4: Still in the Curves Pop Up Window, go to the "Channels" window and select "Reds" in the drop-down menu.
In the figure below, we are looking at a graph of the reds in our picture. The bottom left corner are the darker spots of our image and the top right corner are the lighter parts of our image. The graph indicates how much red is in each part of that image between those two bookends. I have too much red in my dark shadows so I'm going to adjust the graph in the bottom left corner.
Click on the bottom left corner and drag it to the right. What I'm directing Photoshop to do is to reduce the red in the darkest parts of my picture. Thus the graph in that corner is now a flatline indicating "No red." This step can be skipped if there is no overpowering areas of red.
Let's tweak the overpowering blues and greens so more.
Step 5: Select "Blues" from the dropdown menu in "Channels"
Hint: You can click on any part of your picture, and that area will light up on your graph as a single point. You can then pull that point up or down to influence the amount of blue. Warning, it will shift your graph and your color perspective as well.
Step 5 continued=I'm just pulling the blues down...I'm dropping the top right corner of the graph by dragging it down to reduce the blues in the lighter portion(the water) in my photo. I'm just eyeballing it, so drag it up and down until you get the image you want. You can do it with the green too.. When you're done. Press okay and the "Curves" window will close.
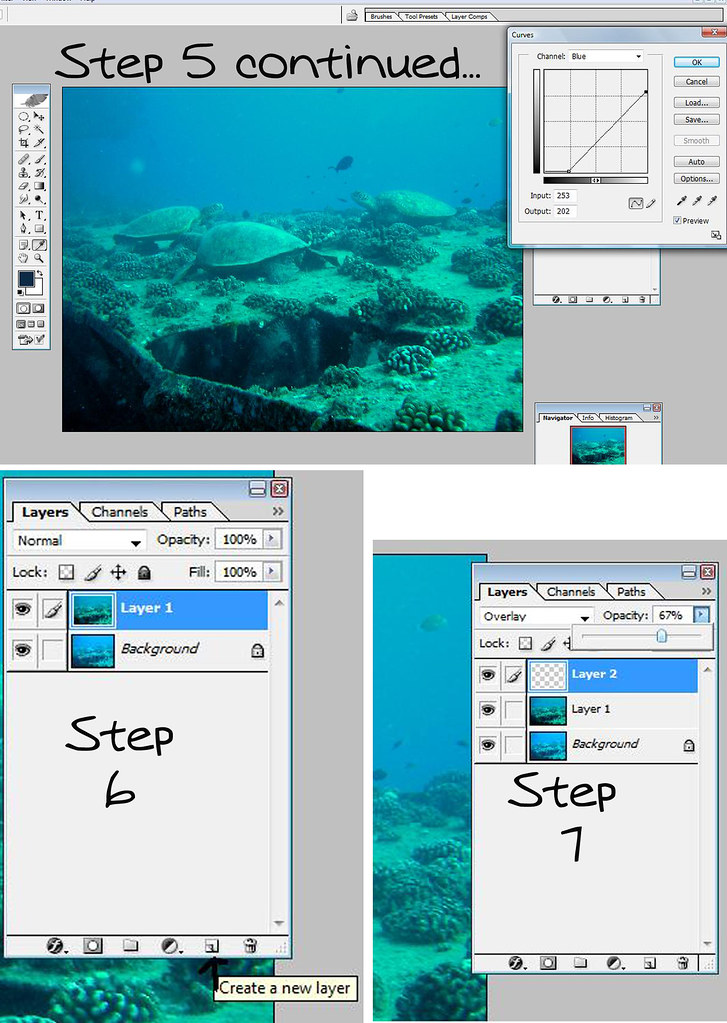
You're done...but you can continue with one of my favorite touches. Painting in Overlay Mode.
Step 6: Go to your layers window and "create new layer." A blank layer should pop up.
Step 7: In the layers window, change the "Normal" to "Overlay" in the drop-down menu
Step 8: We're going to choose a paint color to paint with. So, click on the box with your foreground color.
You can get many different looks with this action depending on what color you pick. I want the turtles to stand out just a little more. So, I'm going to pick green. Now painting green on this layer will cast a green hue to only things that already have a little green to them. If I paint green over a white area, nothing is going to happen. I just want to bring out whatever green there may be in the turtle shell. I could try yellow, realizing that there are probably some yellow tones in there too.
The second thing to consider in color choice is the darkness or lightness of colors. Really light colors are going to lighten the image you're painting over. Dark colors are going to darken the image you are painting over. Thus, this also one of my favorite cheat methods to lighten and darken (burn and dodge) certain pictures. Create an overlay layer and then paint with black to darken, or white to lighten.
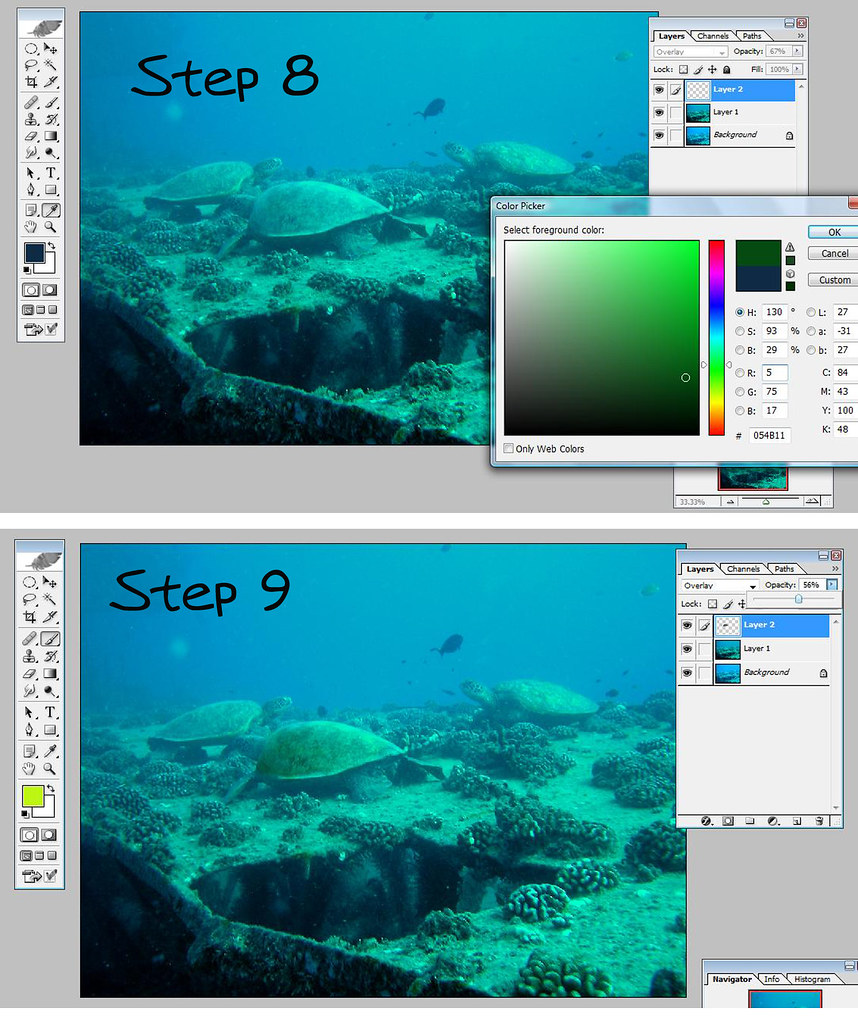
Step 9: Decrease the opacity of this layer to around 65-80%.
If you leave it at its original 100%, you're going to look like you're spraypainting neon green over your turtles and it will turn into kid art. You can increase or decrease the opacity later to taste.
Use the paintbrush tool to start painting with the green you selected over the turtleshell.
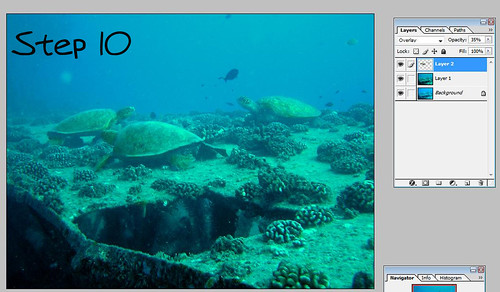
Step 10: I painted over all three of the turtles. Then I adjusted the opacity of the layer to mimic a REALISTIC image. I have a tendency to put too much color and it doesn't look real. You just want to enhance, not forge your way into cartoon world.
I finished it off with a soft vignette look to darken around the edges(another tutorial...another time).
Taaa Daa...it's not phenomenal...but it is an improvement.
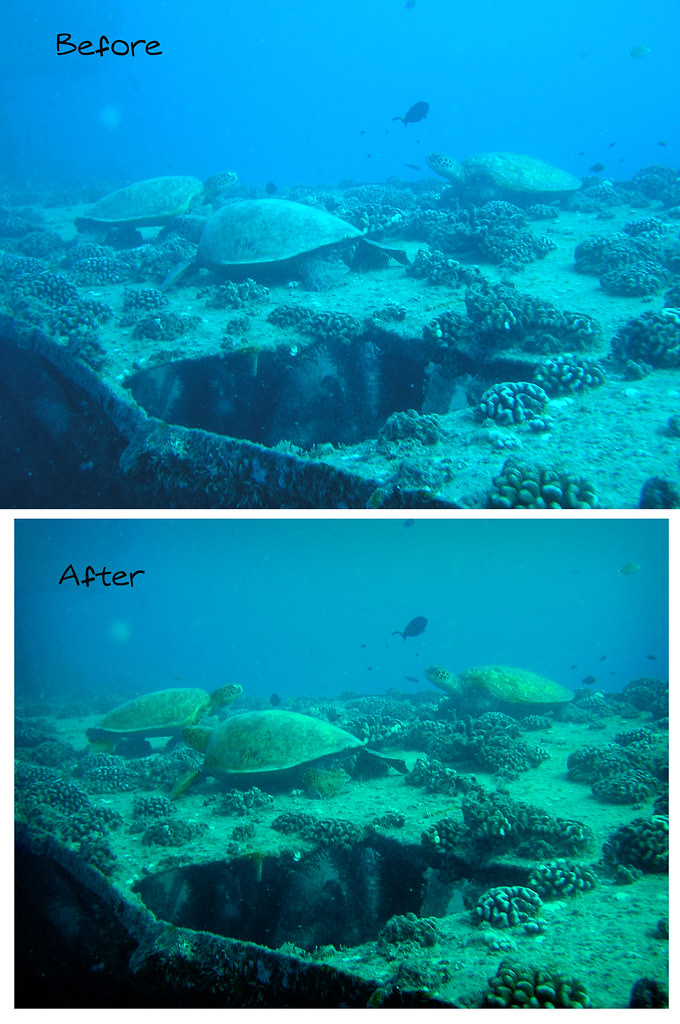
Darn it...it's a matter of opinions. I just like the second one a tiny bit better. But three turtles...come on...they're always going to be cute.
No comments:
Post a Comment